How to enable Windows Subsystem for Linux (WSL)
Introduction
The following tutorial was done with a Windows 11 computer using an x64 processor. These steps may vary depending on your system.
In this tutorial we will learn how to enable WSL which stands for Windows Subsystem for Linux. We will need this to install Linux distro’s (distributions for short) in the future. It is recommended that all other apps are closed before beginning this process as your system will need to restart.
Let’s begin.
First we need to enable the support for WSL to do this
Press the Win key or click your start menu and type turn windows features on or off
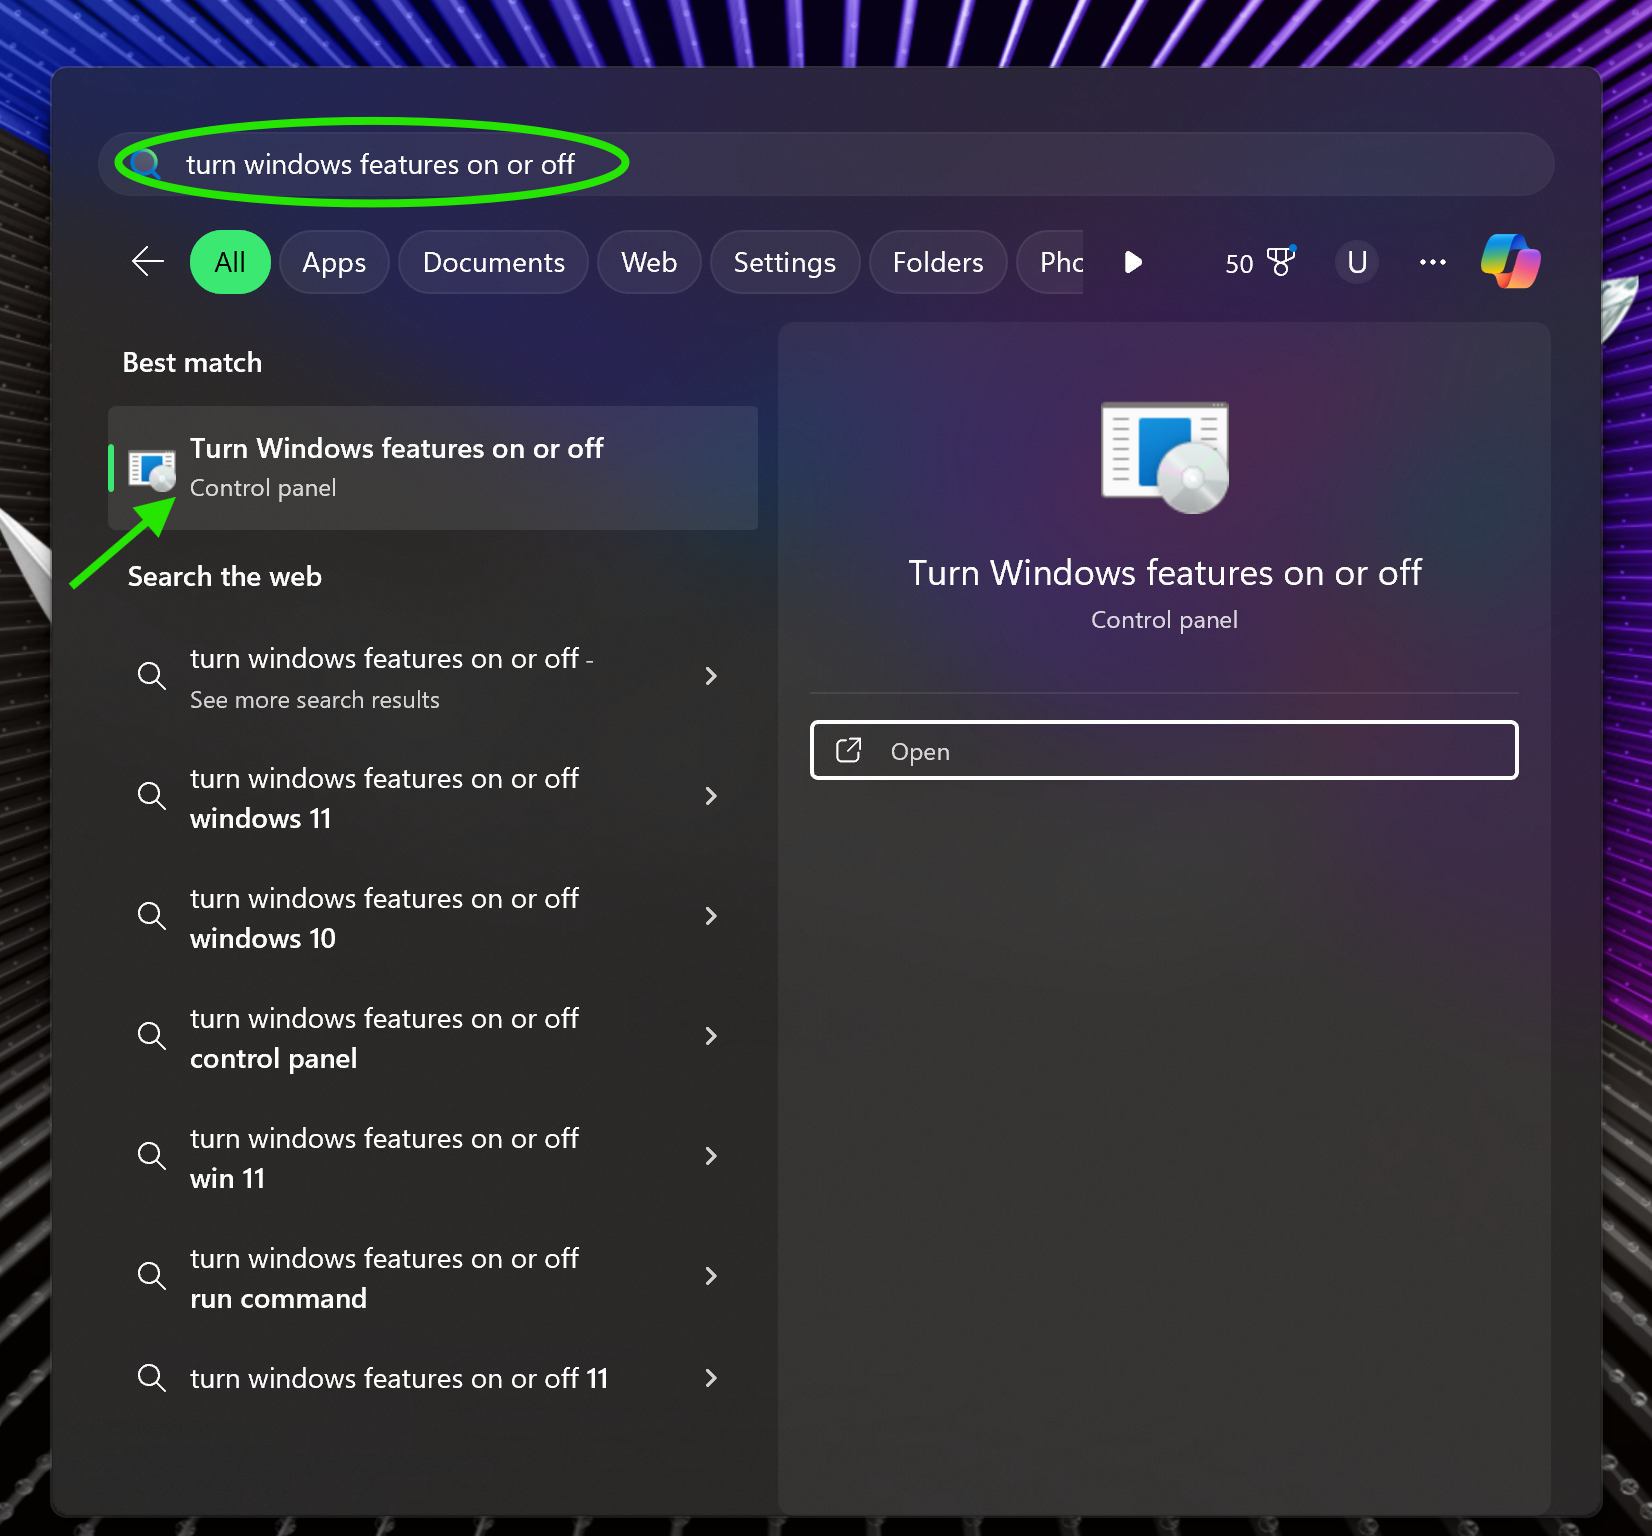 Press enter or click this. Then check the box next to
 Windows Subsystem for Linux this will be located at the bottom since the folders are in alphabetical order
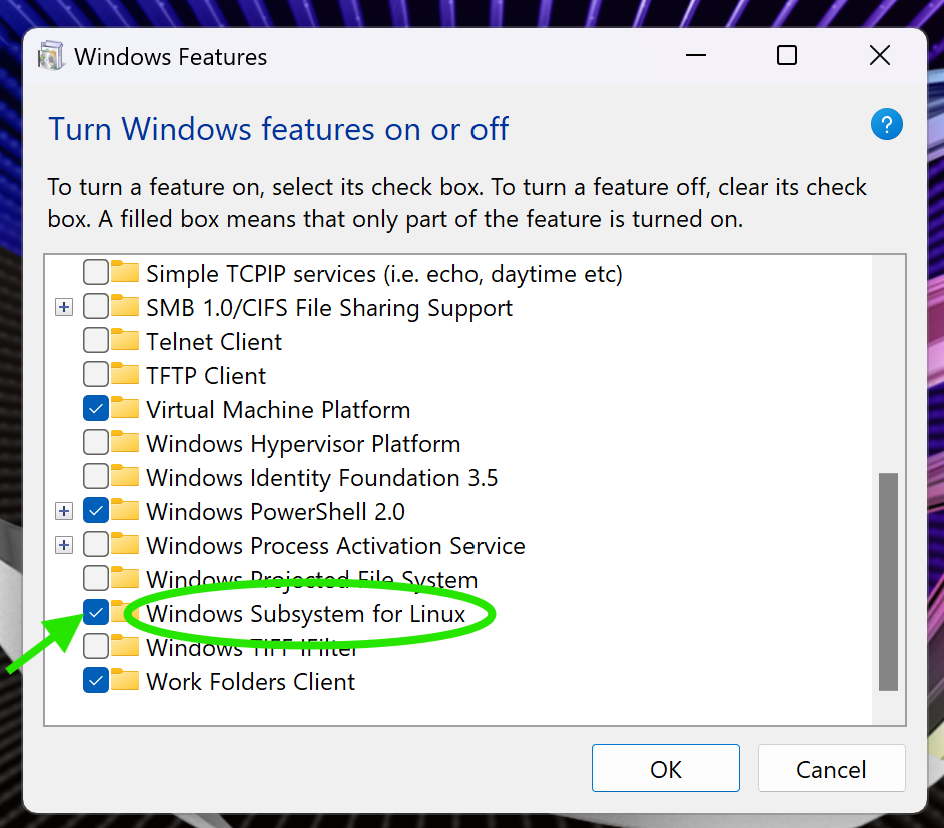 Then click
 OK After it has finished applying the changes click the button that says Restart now
Once your computer has restarted press the Win key or click your start menu and type cmd
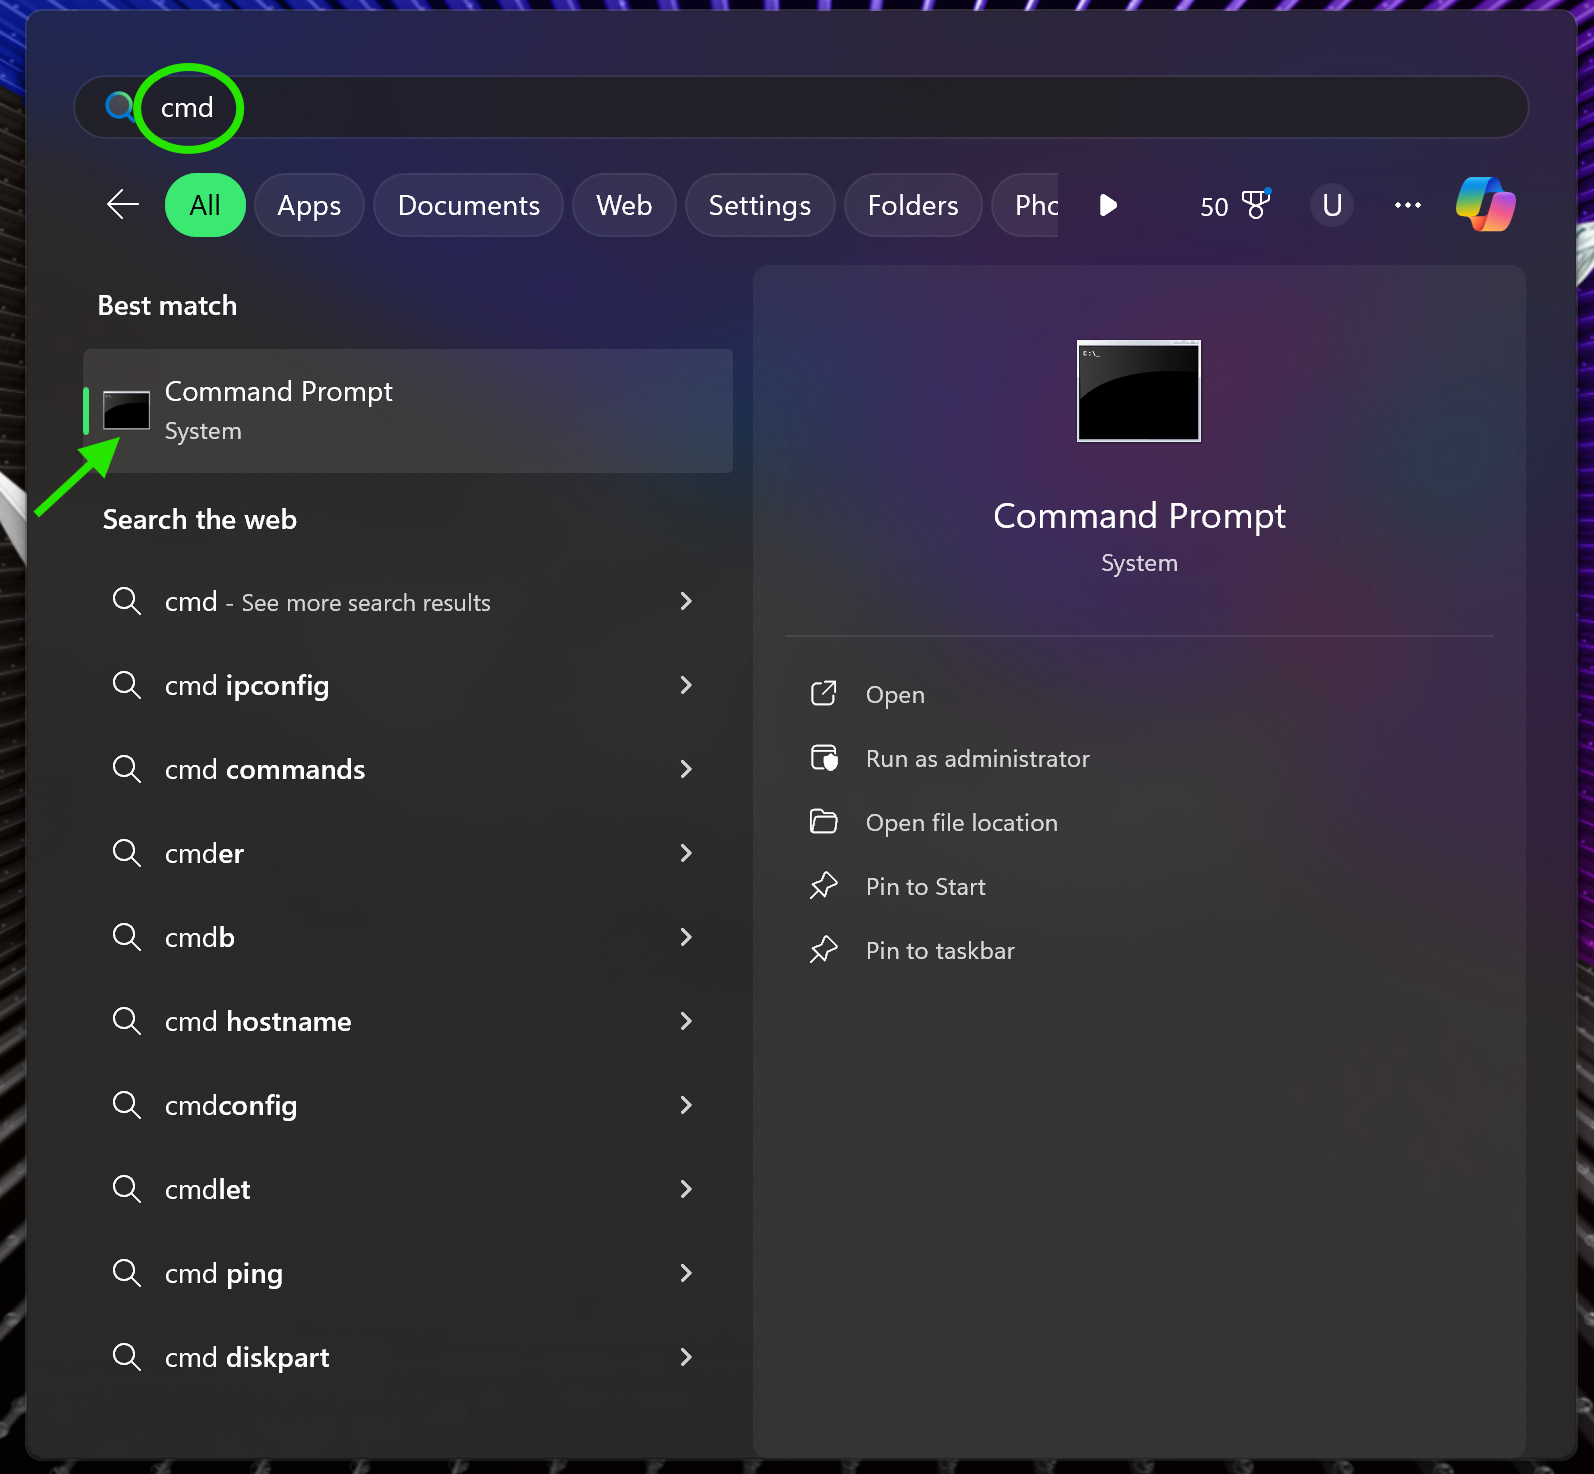 Open
Open Command Prompt, type bash and press enter.
This will confirm WSL is installed on your computer. If you don’t return an error the activation was successful!
Congratulations you now have enabled WSL on your computer!